

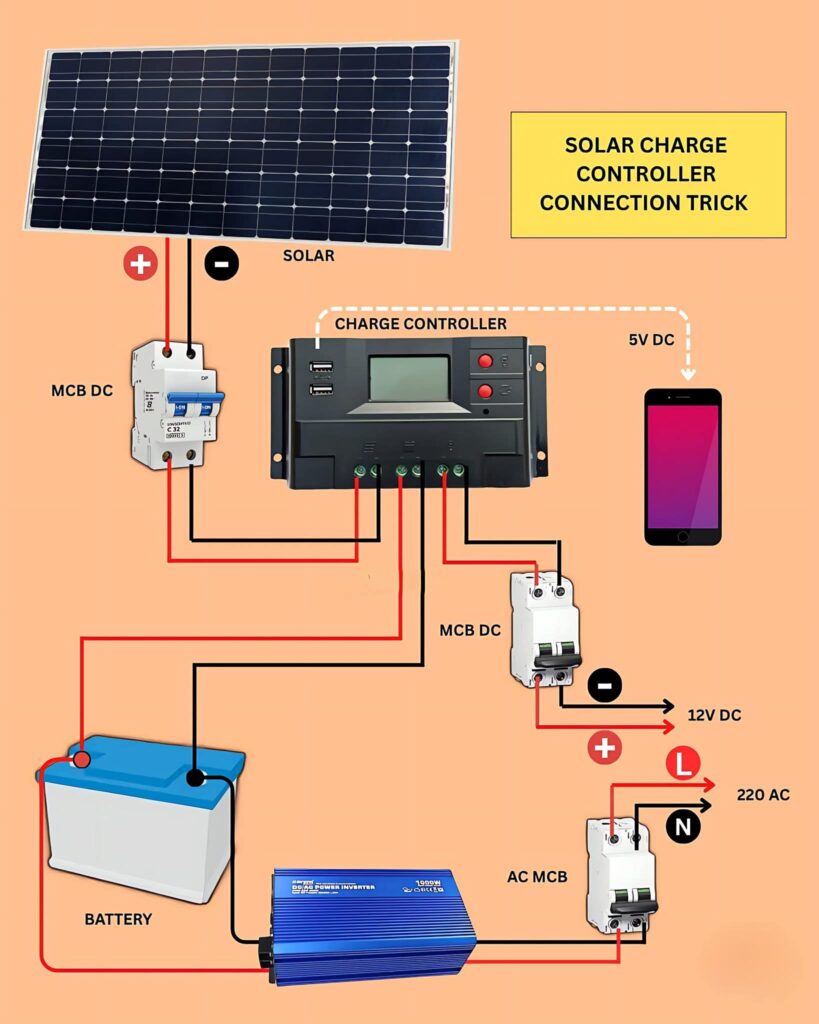
This diagram clearly illustrates how to connect a solar panel system with a charge controller, battery, and inverter to manage both DC and AC power efficiently. It’s a practical setup for off-grid or backup power systems, ensuring safe energy flow from solar panels to household appliances.
Key Components:
- Solar Panel: Converts sunlight into DC electricity.
- Charge Controller: Regulates voltage and prevents battery overcharging.
- Battery: Stores solar energy for later use.
- Inverter: Converts stored DC power into 220V AC for home use.
- MCB (Mini Circuit Breakers): Protects each part of the circuit from overload or short circuits.
Working Principle:
The solar panel charges the battery through the charge controller, which controls voltage and current. The inverter then converts the stored DC power into usable AC power. The setup also includes 5V USB output for charging small devices directly.
Study smarter with VoltageLab
Built for electricians, apprentices, and electrical engineers who want faster practice and better exam prep.
⭐️ Join thousands of electricians upgrading their skills
⚡ Tip: Always ensure correct polarity connections (+ and –) to avoid damage to the charge controller or battery.
Practice more with electrical quizzes
NEC · BS7671 · AS/NZS · CEC · DIN VDE